When repairing your DIY alternator, follow these top 10 tips and tricks for successful repair. These methods can help improve the function and longevity of your alternator without needing professional assistance.
By implementing these techniques, you can save time and money while ensuring your alternator works efficiently for an extended period. When working on your vehicle’s alternator, it is essential to have the right tools and knowledge to execute the repair effectively.
Understanding these DIY repair tips can empower you to confidently address any alternator issues that may arise. Whether you are a seasoned DIY enthusiast or a novice, these tricks will guide you through the repair process, making it smoother and more manageable.
1. Choosing The Right Tools
To ensure successful DIY alternator repair, selecting the right tools is crucial. From socket sets and wrenches to a multimeter and a voltage regulator tester, having the proper equipment on hand will make your repair job safer and more efficient.
With the right tools, you can tackle your alternator repair with confidence and precision.
Selecting the Correct Tools When it comes to DIY alternator repair, choosing the right tools is essential for a successful repair job. Using the correct tools can help you avoid costly mistakes and ensure that the repair process goes smoothly. Here are a few tips to help you select the right tools for your alternator repair project: 1. Sourcing Quality Supplies: Before you begin your alternator repair, it’s important to source quality supplies. This includes choosing tools that are durable and built to last. Investing in high-quality tools will not only make your repair job easier but also ensure that you don’t have to constantly replace them. So, make sure to check the quality of the tools before making a purchase. 2. Doing Your Research: Before you start working on your alternator, it’s important to do some research and find out which tools are required for the specific make and model of your vehicle. Different alternators may have different specifications, so it’s important to have the right tools that are compatible with your alternator. This will help you avoid any unnecessary complications during the repair process. 3. Checking for Compatibility: In addition to doing your research, it’s also important to check for compatibility between the tools and your vehicle’s alternator. Ensure that the tools you choose are specifically designed for the type of alternator you have. This will help you avoid any damage to the alternator or any other components of your vehicle. 4. Safety First: When selecting tools for your alternator repair, prioritize safety. Ensure that the tools you choose are safe to use and have features such as insulation on handles or non-slip grips. This will minimize the risk of accidents or injuries during the repair process. 5. Proper Storage: After the repair job is done, it’s important to store your tools properly. This will help keep them in good condition for future use and prevent any damage. Invest in a tool storage solution, such as a toolbox or a pegboard, to keep your tools organized and easily accessible. In conclusion, selecting the right tools is crucial for a successful DIY alternator repair. By sourcing quality supplies, doing your research, checking for compatibility, prioritizing safety, and properly storing your tools, you can ensure a smooth and efficient repair process. So, take the time to choose the right tools for your alternator repair project and enjoy the satisfaction of a job well done.
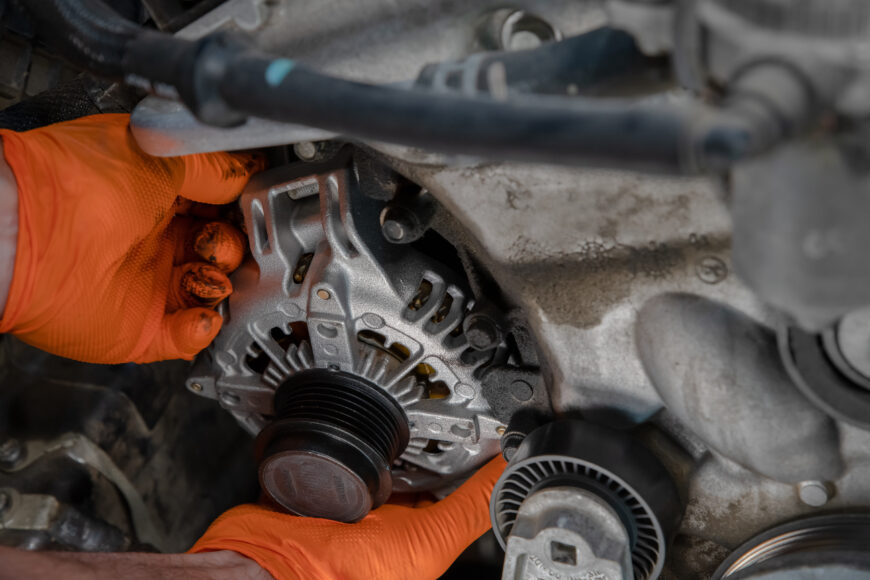
Credit: www.ebay.com
2. Understanding Alternator Basics
2. Understanding Alternator Basics
Components Of An Alternator
An alternator is composed of key components that work together to convert mechanical energy into electrical energy.
- Rotor
- Stator
- Diode Rectifier
- Voltage Regulator
Functions Of Each Component
| Component | Function |
|---|---|
| Rotor | Produces a rotating magnetic field when electrical current is supplied |
| Stator | Converts the rotating magnetic field into electrical energy through induction |
| Diode Rectifier | Converts alternating current (AC) produced by the stator into direct current (DC) |
| Voltage Regulator | Controls the output voltage of the alternator to ensure it stays within the desired range |
3. Diagnosing Common Issues
In this section, we’ll dive into the crucial aspect of 3. Diagnosing Common Issues when it comes to DIY alternator repair. Properly identifying the common problems and performing initial testing are essential steps to effectively troubleshooting and resolving alternator issues. Let’s explore these tasks in detail to help you get your alternator back in working order.
Identifying Common Alternator Problems
- No Charge Warning Light: Check if the warning light is illuminated on your dashboard.
- Strange Noises: Listen for abnormal sounds like grinding or whining coming from the alternator.
- Dim Lights: Notice any dimming of headlights or interior lights while driving.
- Battery Issues: Look for signs of a weak battery or frequent jump-starts needed.
Performing Initial Testing
- Belt Inspection: Ensure the alternator drive belt is not loose or damaged.
- Voltage Check: Use a multimeter to measure the voltage output of the alternator.
- Battery Test: Verify the battery condition to rule out potential battery-related problems.
By identifying these common problems and conducting initial tests, you can narrow down the root cause of your alternator issues and proceed with the appropriate DIY repair steps.
4. Step-by-step Repair Guide
When it comes to DIY alternator repair, having a step-by-step guide can make all the difference. By following a systematic approach, you can confidently tackle the repair process and ensure that your alternator is functioning optimally. In this section, we will outline the disassembly process, repairing or replacing faulty parts, and reassembly and testing.
Disassembly Process
The disassembly process is the first step in repairing your alternator. Follow these steps to safely disassemble your alternator:
- Disconnect the negative battery cable to prevent any electrical hazards.
- Using a wrench, remove the electrical connections attached to the alternator.
- Loosen and remove the mounting bolts that hold the alternator in place.
- Carefully remove the alternator from its mounting location, taking note of its orientation.
Repairing Or Replacing Faulty Parts
Inspecting and repairing or replacing faulty parts is the next crucial step in the repair process. Consider the following tips:
- Assess the condition of the alternator components, such as the voltage regulator, brushes, and bearings.
- If you notice any signs of wear or damage, such as worn-out brushes or a faulty regulator, these components should be repaired or replaced.
- Consult the manufacturer’s manual or seek professional advice to ensure you select the correct replacement parts.
- Clean any debris or dirt buildup that may be affecting the alternator’s performance.
Reassembly And Testing
After repairing or replacing any faulty parts, it’s time to reassemble the alternator and test its functionality. Here’s what you need to do:
- Carefully place the repaired or new components back into the alternator, ensuring proper alignment.
- Secure the alternator in its mounting location by tightening the mounting bolts.
- Reconnect the electrical connections to the alternator, ensuring a secure fit.
- Reconnect the negative battery cable.
- Start the engine and observe the alternator’s performance.
- Use a multimeter to check the output voltage of the alternator, ensuring it falls within the recommended range.
- If the alternator is functioning correctly, you’ve successfully repaired it! If not, double-check your connections and consult further troubleshooting resources.
By following this step-by-step guide, you can confidently repair your alternator and save yourself time and money. Remember to always prioritize safety and consult professional advice if needed. Happy repairing!
5. Preventive Maintenance And Longevity
5. Preventive Maintenance and Longevity
Regular maintenance is crucial for ensuring the longevity and optimal performance of your alternator. By incorporating preventive measures and addressing potential issues early on, you can extend the lifespan of your alternator and prevent costly repairs down the line.
Regular Checks And Maintenance
Performing regular checks on your alternator can help identify potential problems before they escalate, saving you time and money in the long run. Make it a habit to inspect the alternator for any signs of wear, such as frayed wires or loose connections. Additionally, keeping the alternator clean and free of debris can contribute to its longevity.
Extending Alternator Lifespan
To maximize the lifespan of your alternator, consider implementing these tips:
- Ensure proper belt tension to prevent unnecessary strain on the alternator.
- Keep the battery terminals clean and corrosion-free to facilitate optimal charging.
- Regularly check the alternator’s output using a multimeter to detect any deviations from the standard voltage levels.
- Monitor the vehicle’s electrical systems for any irregularities, which could indicate potential alternator issues.
By prioritizing preventive maintenance and taking proactive steps to extend the life of your alternator, you can minimize the risk of unexpected failures and enjoy a more reliable vehicle overall.
Credit: www.jpost.com
Credit: www.autozone.com
Frequently Asked Questions On 10 Best Diy Alternator Repair Tips And Tricks
How Do You Make A Bad Alternator Work?
To make a bad alternator work: 1. Check the battery connections and make sure they’re secure. 2. Test the alternator output with a volt meter and replace if necessary. 3. Clean the alternator terminals and check the belts for tightness. 4.
Ensure the alternator’s ground connection is secure. 5. If none of these steps work, it’s best to have a professional mechanic inspect and repair the alternator.
Can You Fix An Alternator By Yourself?
Yes, you can fix an alternator yourself if you have mechanical skills and proper tools.
How Do You Fix A Faulty Alternator?
To fix a faulty alternator, first diagnose the issue, then remove and replace it with a new one. Check the connections and drive belt as well.
Can I Rebuild My Alternator Myself?
Yes, you can rebuild your alternator yourself. It is possible to do this task on your own with some knowledge and tools. Follow a guide for step-by-step instructions to ensure proper reassembly. However, if you are unsure or lack experience, it is recommended to consult a professional for assistance.
Conclusion
To wrap it up, these top 10 DIY alternator repair tips and tricks are essential for anyone looking to save time and money. By following these straightforward steps, you can easily diagnose, repair, and maintain your car’s alternator without the need for professional help.
Remember, regular maintenance and early detection are key to ensuring your alternator remains in optimal condition. So, roll up your sleeves and get started on fixing your alternator issues today!