Replacing your car’s alternator is a straightforward task that requires basic tools and mechanical knowledge. Understand the steps and safety precautions before starting.
Performing regular maintenance on your car can save you money in the long run and ensure a smooth driving experience. In this beginner’s guide, we will walk you through the process of replacing your car’s alternator, giving you the confidence to tackle this task on your own.
Let’s dive in and learn how to replace your car’s alternator efficiently and effectively.
Credit: www.autozone.com
Why You Might Need To Replace Your Car’s Alternator
Why You Might Need to Replace Your Car’s Alternator
Your car’s alternator plays a crucial role in ensuring the proper functioning of your vehicle. If you start experiencing issues with your car’s electrical system, it might be a sign that your alternator needs replacing.
Signs Of A Failing Alternator
- Dimming or flickering headlights
- Dashboard warning lights
- Strange noises like grinding or whining
- Difficulty starting the car
- Dead battery or frequent jump-starts
Understanding The Role Of The Alternator
The alternator is responsible for charging your car’s battery while the engine is running. It also powers the electrical system of your car and ensures that all electronic components function properly.
Choosing The Right Alternator For Your Car
Selecting the correct alternator is crucial for your car’s performance. Ensuring compatibility and quality is key.
Determining The Correct Alternator
Identify your car’s make, model, and year to determine the exact alternator specifications it requires.
Considering Rebuilt Vs. New Alternators
- Rebuilt Alternators: Cost-effective option, reconditioned to meet OEM standards.
- New Alternators: Higher upfront cost, but ensures reliability and longevity.
Preparing To Replace Your Car’s Alternator
Before diving into the process of replacing your car’s alternator, it is important to take a few necessary steps to prepare yourself for the task ahead. By gathering the necessary tools and parts and locating the alternator in your car, you can ensure a smooth and hassle-free replacement process. Let’s explore each of these steps in detail:
Gathering The Necessary Tools And Parts:
To successfully replace your car’s alternator, you will need a set of tools and parts specifically designed for this task. By preparing these in advance, you can save time and avoid any unnecessary delays. Here are the essential tools and parts you will need:
| Tools | Parts |
|---|---|
|
|
By having these tools and parts readily available, you can ensure a smooth replacement process without any interruptions.
Locating The Alternator In Your Car:
Once you have gathered all the necessary tools and parts, the next step is to locate the alternator in your car. The alternator is a vital component responsible for generating electricity to charge the battery and power the electrical system of your vehicle. Here’s how you can find the alternator:
- Refer to your car’s owner manual for specific instructions on locating the alternator
- If the manual is not available, open the car’s hood and look for a cylindrical-shaped component with wires connected to it
- The alternator is typically located near the front of the engine, either on the left or right side
- It may be necessary to remove certain components or panels to access the alternator
- Ensure the car’s engine is cool before attempting to locate and remove the alternator
By following these steps, you can easily locate the alternator in your car and proceed with its replacement confidently.
Credit: startersolenoid.net
Step-by-step Guide To Replacing Your Car’s Alternator
Are you facing issues with your car’s alternator and considering replacing it yourself? Replacing your car’s alternator can be a daunting task, but with the right guidance, you can do it yourself. In this step-by-step guide, we’ll walk you through the process of replacing your car’s alternator so you can get back on the road in no time.
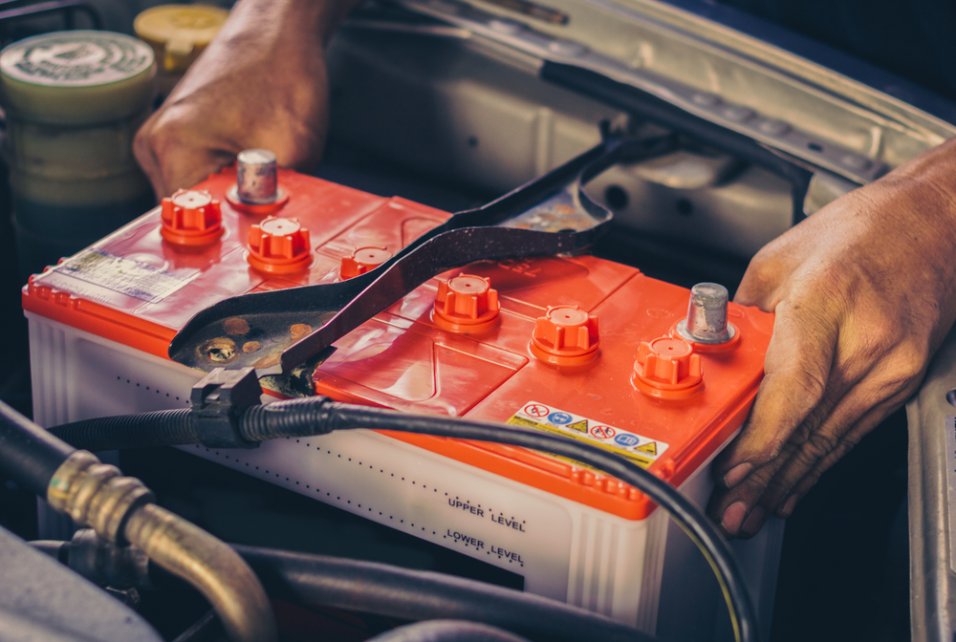
Disconnecting The Battery
Before starting the alternator replacement process, it’s crucial to disconnect the battery to prevent any electrical mishaps. Open the hood of your car and locate the battery. Use a wrench to loosen the nut on the negative terminal, and then carefully remove the negative cable. Once the negative terminal is disconnected, repeat the same process for the positive terminal.
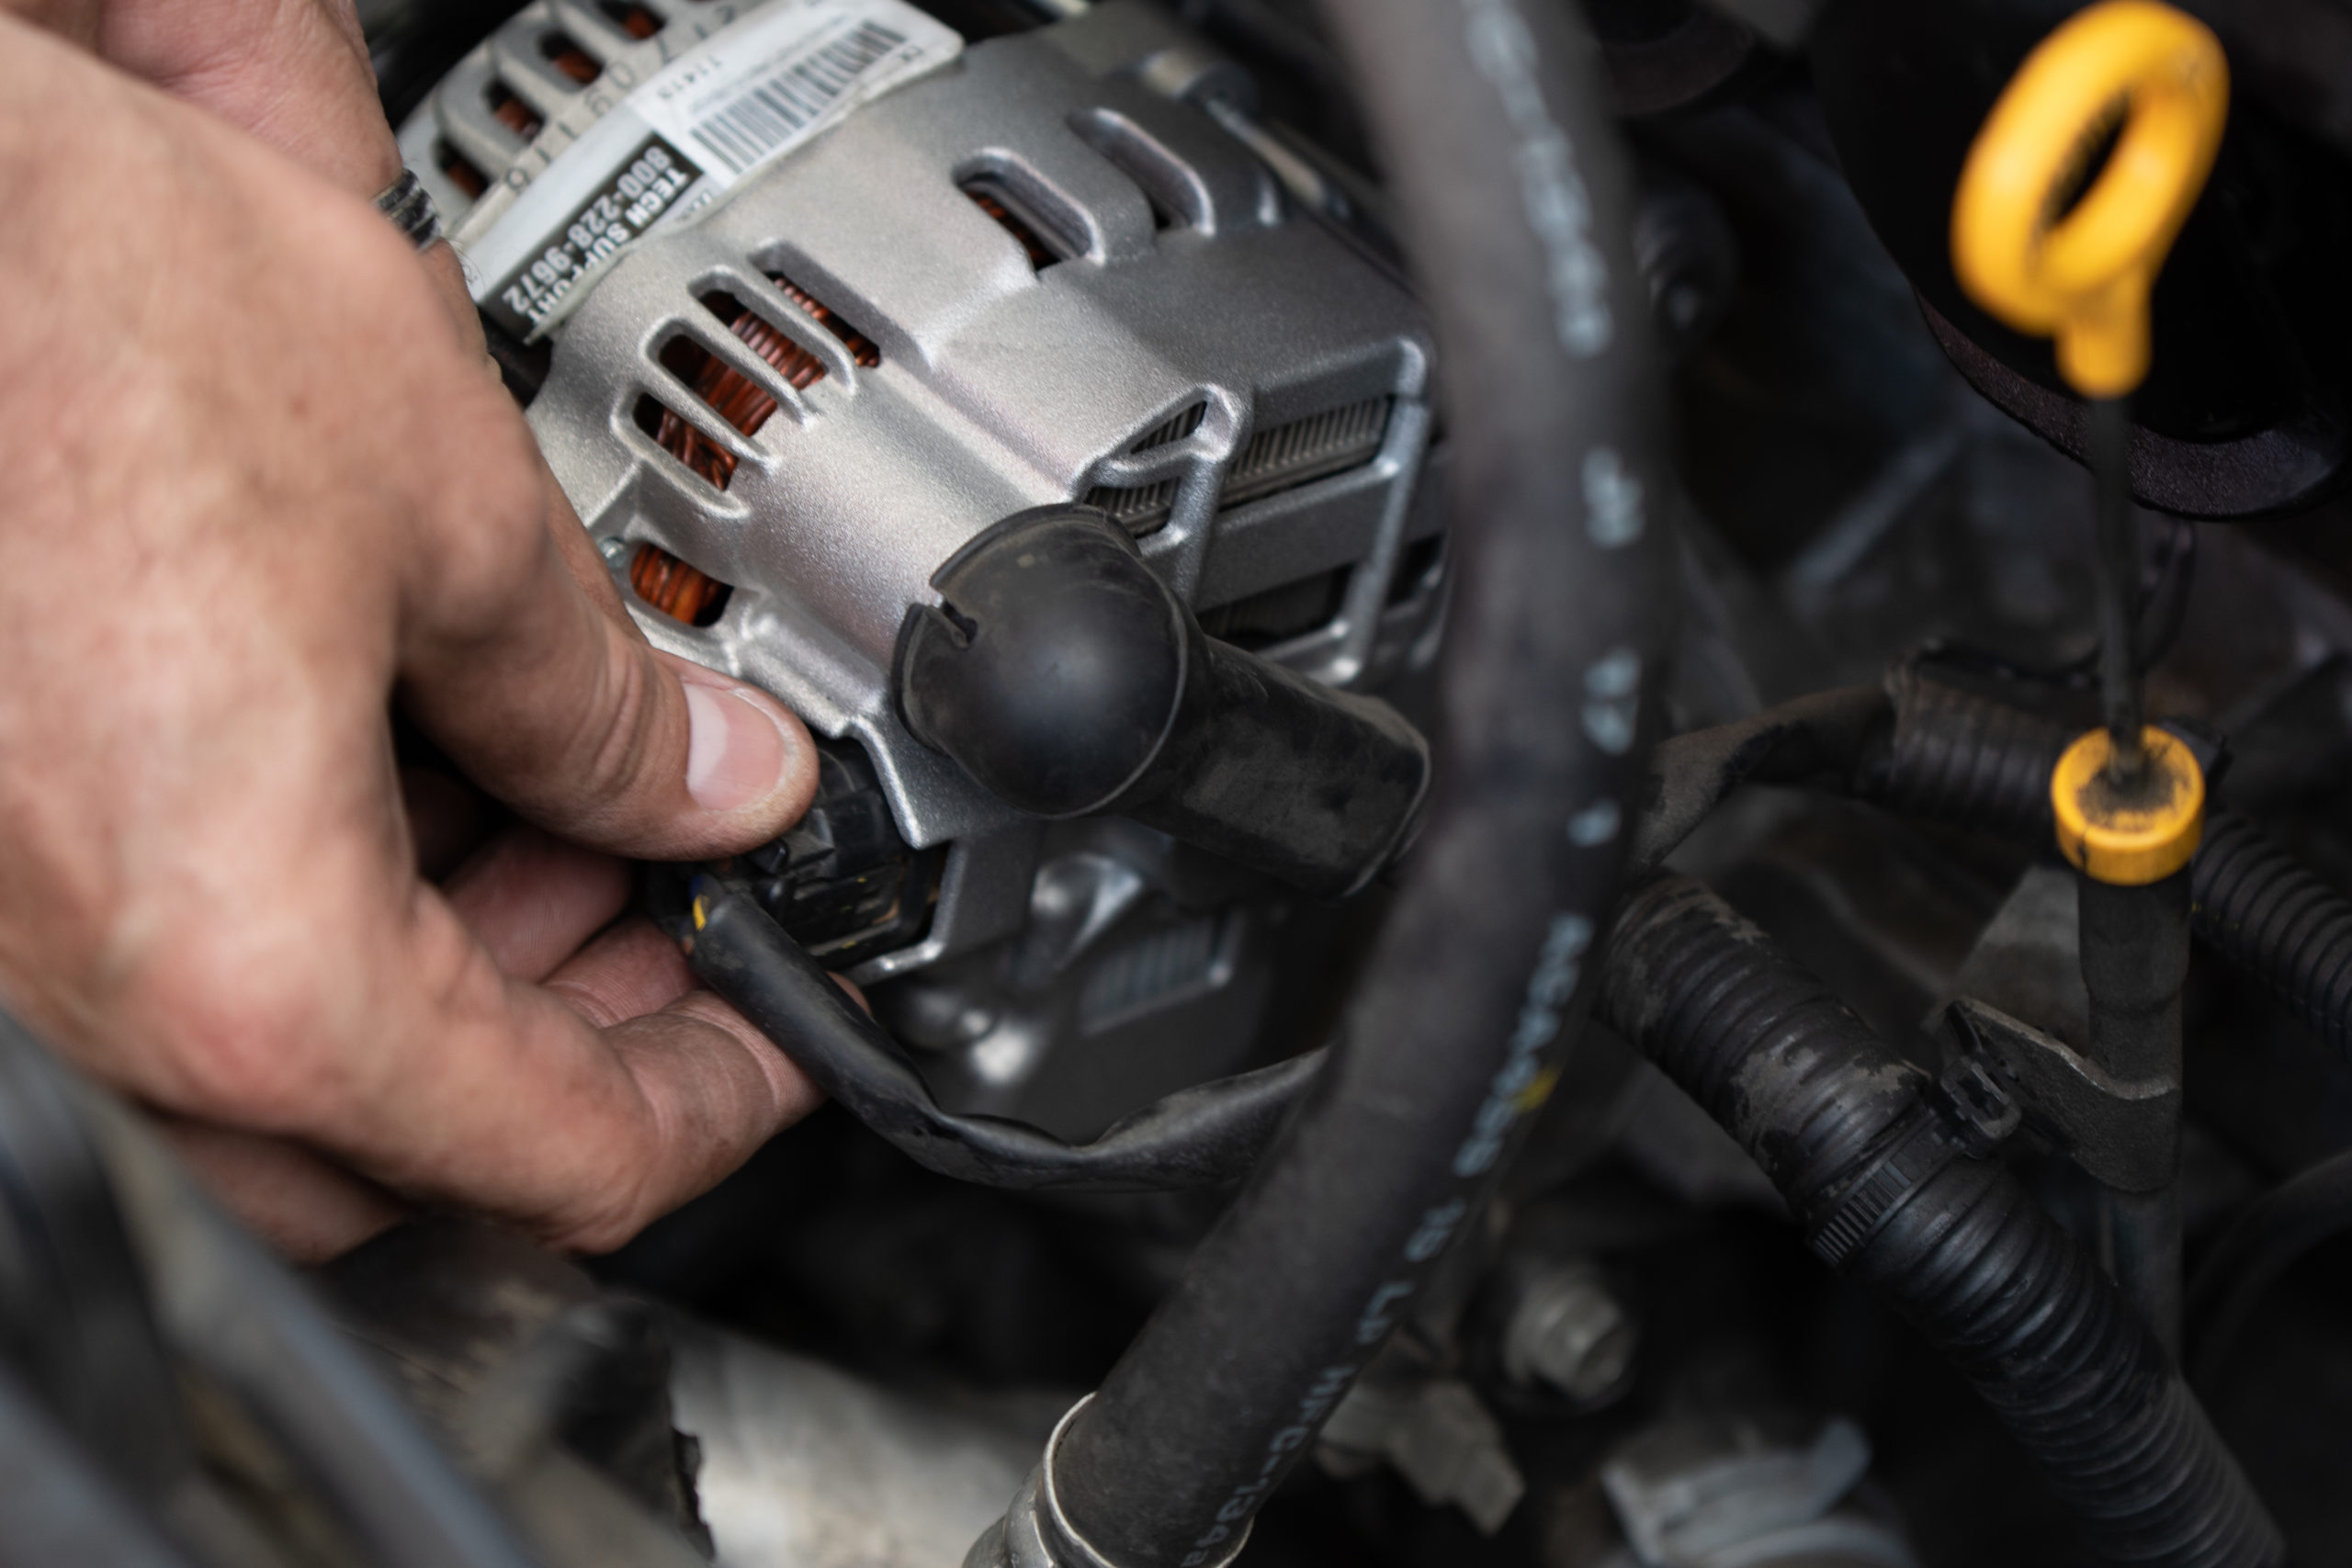
Removing The Old Alternator
Next, you’ll need to remove the old alternator from your vehicle. Begin by locating the alternator, which is typically found near the engine. Loosen the bolts or screws that secure the alternator in place using the appropriate tools. Once the bolts are removed, carefully detach the electrical connections and the drive belt from the alternator. Take note of the positioning and orientation of the alternator before completely removing it.
Installing The New Alternator
Now that the old alternator is removed, it’s time to install the new alternator. Position the new alternator in the same orientation as the old one, and then reattach the electrical connections and drive belt. Ensure that all connections are secure and the alternator is properly aligned. Once everything is in place, tighten the bolts or screws to secure the new alternator.
Reconnecting The Battery
With the new alternator securely installed, it’s time to reconnect the battery. Begin by reattaching the positive terminal to the battery and tightening the nut with a wrench. Then, repeat the process for the negative terminal. Ensure that both terminals are securely fastened and that there are no loose connections.
Tips And Tricks For A Successful Alternator Replacement
If you’re considering replacing your car’s alternator, there are several tips and tricks to keep in mind for a successful alternator replacement. These insights can help streamline the process and ensure that your new alternator is properly installed and functioning optimally in your vehicle.
Testing Your New Alternator
Before installing your new alternator, it’s crucial to conduct thorough testing to verify its functionality. Use a voltmeter to check the voltage output of the new alternator. Additionally, test the alternator’s built-in voltage regulator to ensure that it is working as expected. This step is essential for validating the integrity of the replacement alternator before it is placed in the vehicle, preventing potential issues down the line.
Common Mistakes To Avoid
- Skipping the battery inspection: Before replacing the alternator, thoroughly inspect the battery for signs of corrosion or damage. A faulty or dying battery can place excessive strain on the new alternator, leading to premature failure.
- Ignoring belt and pulley condition: Check the condition of the drive belt and pulleys. Worn-out or damaged components can compromise the performance of the new alternator, potentially causing it to malfunction.
- Failure to secure connections properly: When installing the new alternator, ensure that all electrical connections are secured firmly. Loose connections can result in inefficient charging or even electrical failures.
Credit: www.ymfcarparts.co.uk
Frequently Asked Questions For Beginner’s Guide To Replacing Your Car’s Alternator
Can A Beginner Replace An Alternator?
Yes, a beginner can replace an alternator. It is a relatively simple task that can be done with basic tools. Just make sure to follow a step-by-step guide or watch a tutorial to ensure proper installation.
Can I Replace My Alternator Myself?
Yes, you can replace your alternator yourself. Just ensure you have the necessary tools, knowledge, and safety precautions in place.
When Replacing An Alternator What Else Needs To Be Replaced?
When replacing an alternator, also consider replacing the serpentine belt for optimal performance.
What Tools Do I Need To Replace My Alternator?
To replace your alternator, you will need a few tools. These include a socket set, a wrench, a belt tensioner tool, and a pry bar.
Conclusion
Replacing your car’s alternator may seem like a daunting task for beginners. However, with the right tools and guidance, it can be a manageable DIY project. By following the steps outlined in this guide, you can save money on costly repairs and gain a sense of accomplishment.
Remember to prioritize safety and consult a professional if you encounter any challenges. Get started on this essential car maintenance task and keep your vehicle running smoothly for years to come.